
A useful AI image starts before the tool opens. You need a clear job for the picture, a sharp prompt, and a review step before it reaches a page or campaign. How Create AI-Generated Images is the working phrase for this guide, but the real goal is simple: create visuals that help users understand, trust, and act.
At X-Kaizen, we often see teams generate ten attractive images and still struggle to publish one. The issue is rarely the model. The issue is the brief. A product page, blog hero, ad concept, and support article all need different image choices. Therefore, the workflow below starts with purpose, then moves to prompts, review, SEO, and handoff.
How Create AI-Generated Images with a clear brief
Start with one sentence that explains the image job. For example: "Create a hero image for a blog post about local SEO dashboards." That sentence gives the tool direction and gives your team a way to judge the result. Without it, image generation turns into browsing.
Let us turn your ideas into a stunning digital reality. Message us now!
Next, define the audience and channel. A LinkedIn post can be simpler and bolder. A product page needs accuracy and restraint. A technical article may need a diagram instead of a dramatic scene. Also, decide the image size before prompting. A square social post and a wide blog hero need different composition.
A good brief includes subject, setting, style, color direction, text needs, aspect ratio, and limits. It also states what should not appear. If the brand never uses people, say so. If the image needs space for a headline, include that. If the product must look exact, use reference images and add a manual review step.
OpenAI's image generation guide explains that the API can generate and edit images from text prompts, and it describes different ways to build image experiences. You can review the official source at OpenAI image generation documentation. Use it as a technical reference when the image workflow needs automation or product integration.
AI image prompts that produce usable drafts
AI image prompts work best when they are specific but not crowded. Put the main subject first. Then add the setting, visual style, composition, lighting, and output format. End with constraints. This order helps you revise one part at a time.
Here is a practical prompt shape: "Wide blog hero image, ecommerce operations dashboard on a laptop, clean office desk, natural daylight, green and blue accents, realistic but simple, empty space on the right for title text, no hands, no brand logos." That prompt gives enough direction without asking for every pixel.
After the first result, change one variable. Adjust light. Then change camera angle. Then simplify the background. If you change everything in one prompt, you lose the reason the image improved or failed. Small edits make the process easier to repeat.
For brand work, store the prompts that succeeded. Save rejected versions too, with short notes. This gives the next designer a starting point and prevents the team from repeating the same mistakes. In a business setting, prompt history is part of the creative file.
Text to image tools and review habits
Text to image tools vary in controls, output style, editing options, and rights terms. Some are better for design exploration. Others are better for realistic product-adjacent scenes or illustrations. The best choice depends on the page, brand risk, and team workflow.
Adobe Firefly describes text to image as a way to create visuals from prompts, then refine lighting, style, color, and composition. See Adobe's overview at Adobe Firefly Text to Image. This type of tool is useful when a designer wants quick variations before selecting a direction.
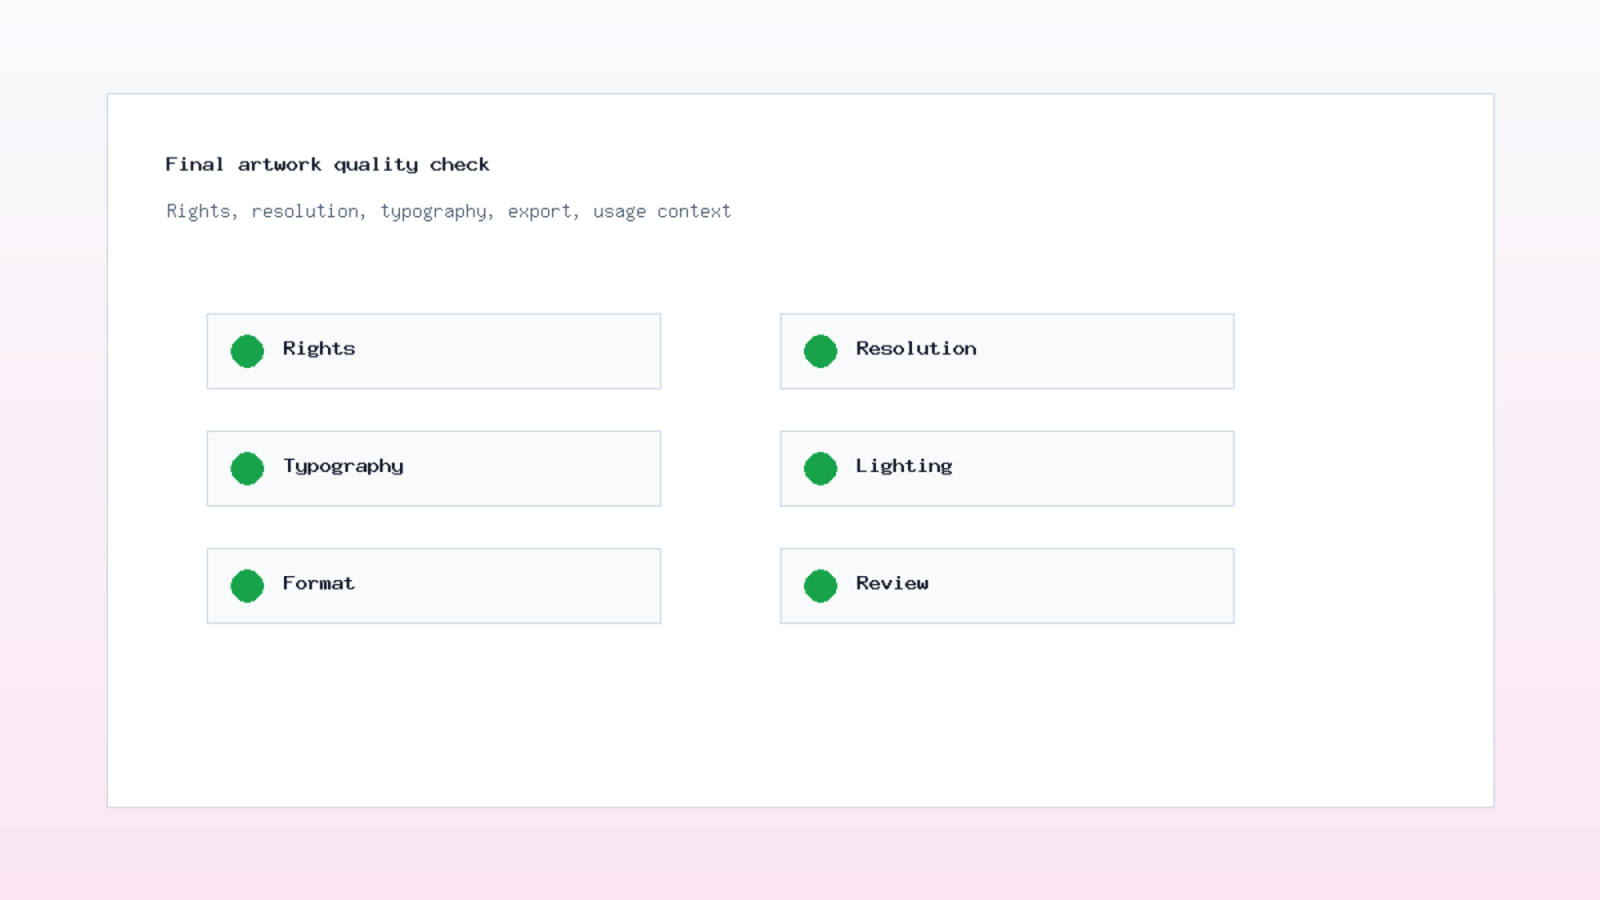
Still, never treat the first output as final. Review faces, hands, text, product details, perspective, and brand fit. If the image represents a real item, compare it with the actual product. If the image supports advice, check that it does not imply a false result.
Rights checks matter too. Review the tool's commercial terms, account plan, and content policy before using generated visuals in ads, packaging, or client work. Keep a record of the tool, prompt, date, and final file. That record helps later if the team needs to prove where a visual came from.
Image generation workflow for teams
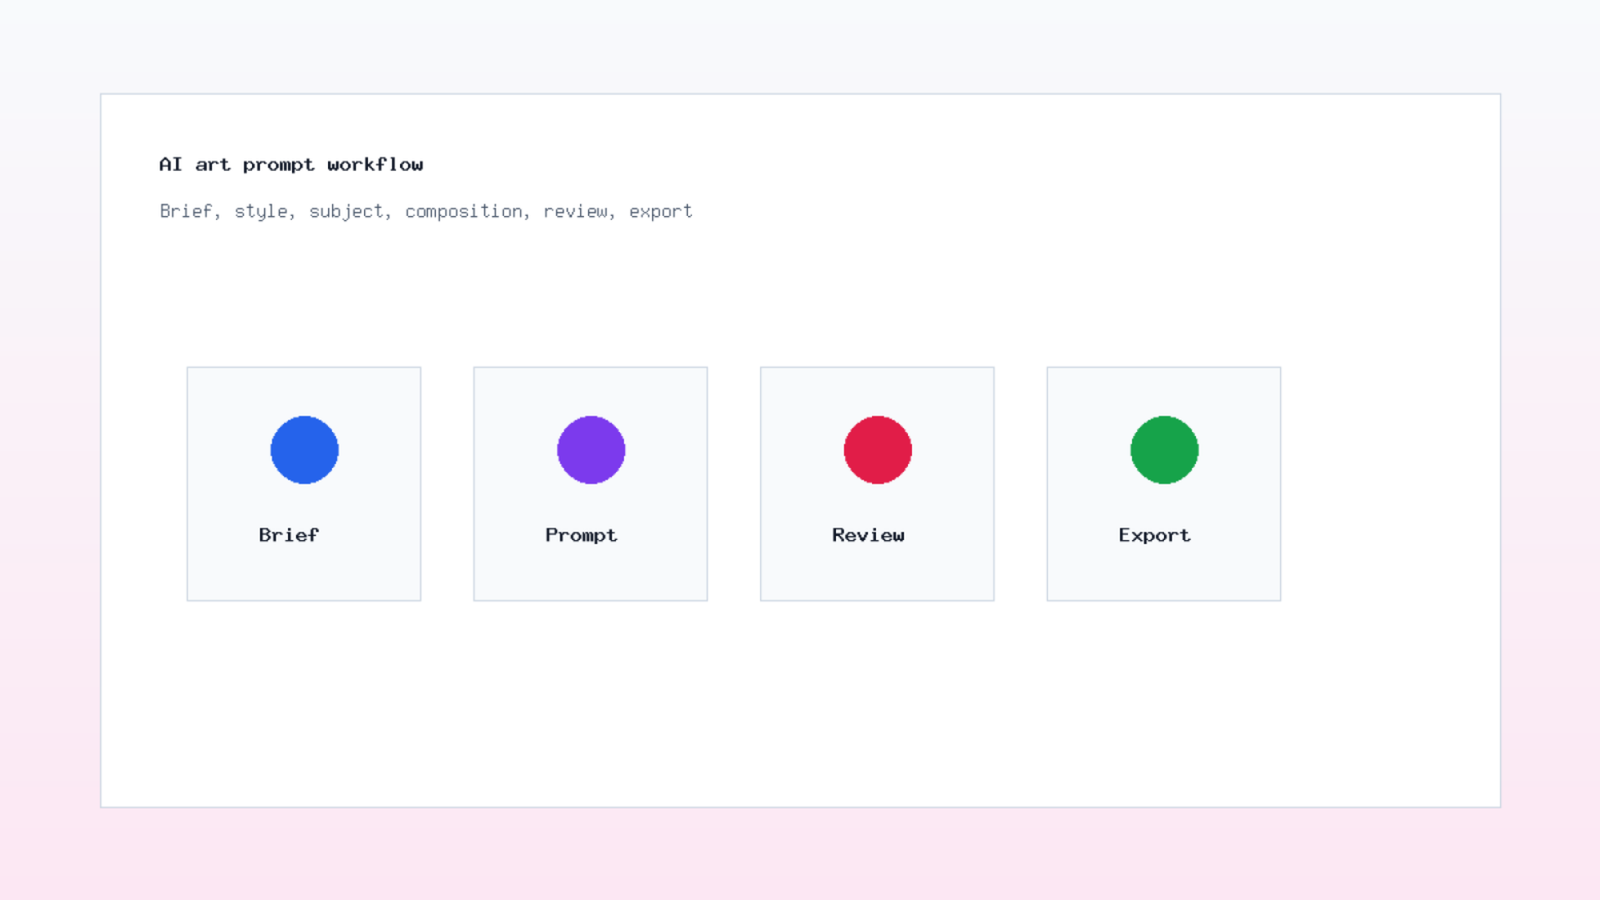
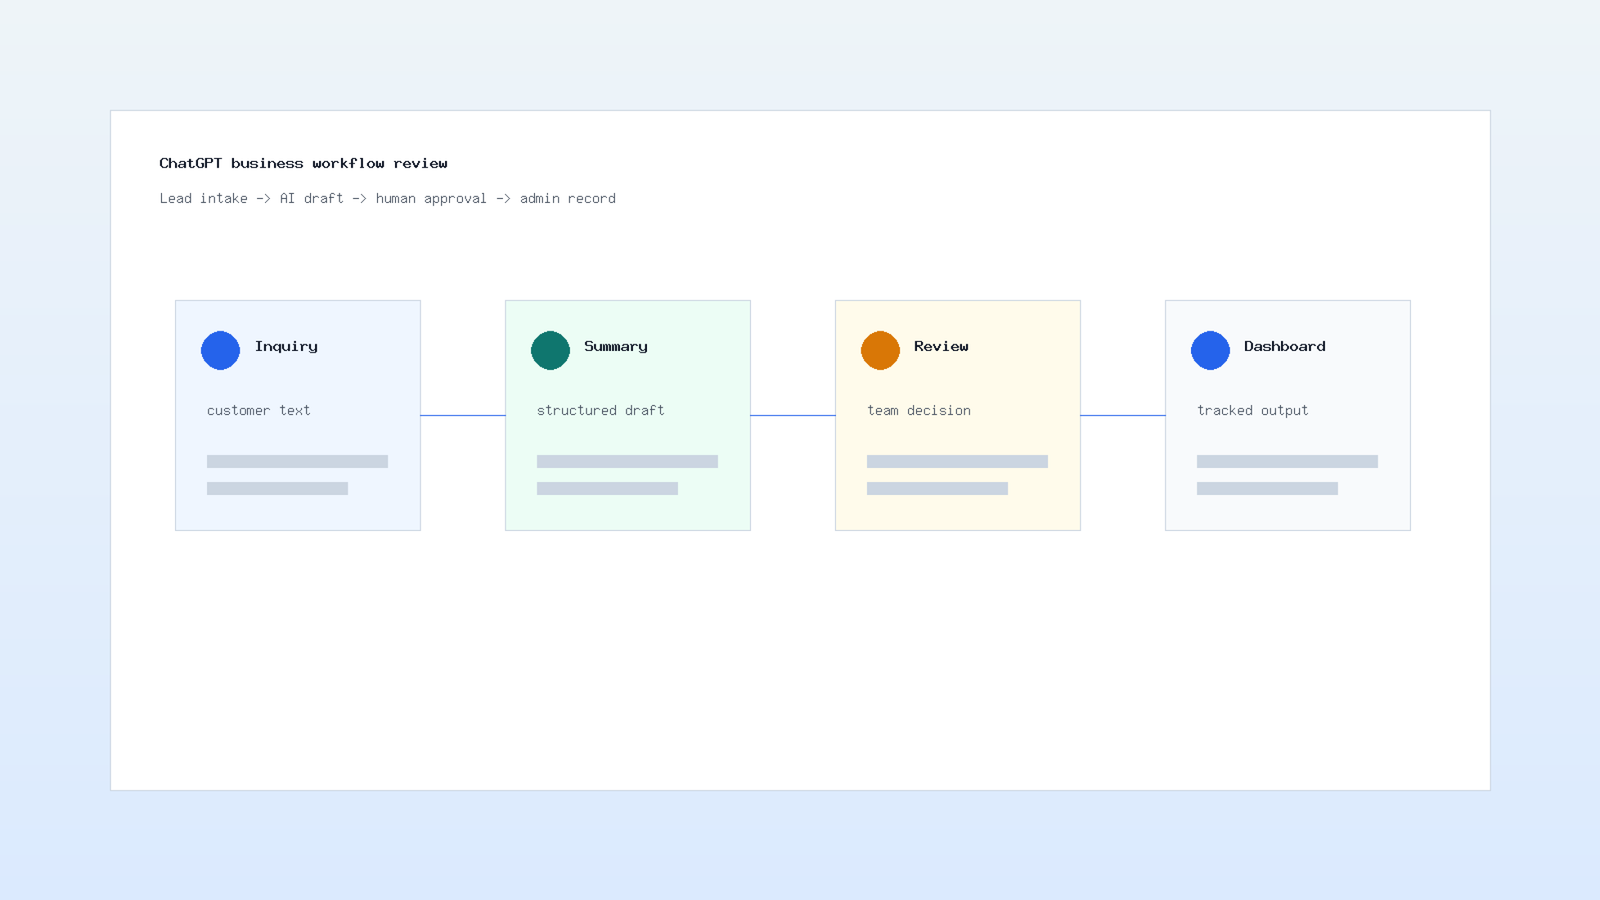
A reliable image generation workflow has five steps: brief, prompt, generate, review, publish. It sounds basic. However, skipping one step creates most of the problems teams face with AI visuals.
Begin with the page owner. They define the goal. Then the designer writes prompts and chooses variations. After that, a reviewer checks accuracy, rights, and brand fit. Finally, the web or content owner prepares the image for publishing.
This process prevents a common mistake: attractive images that do not support the page. A blog article about pricing should not use a vague futuristic graphic. A service page should not use a visual that suggests features the business does not offer. Image quality includes truthfulness.
In our X-Kaizen work, we use this split to keep AI helpful. The model speeds up drafts. The team still decides what belongs on the site. That balance keeps the visuals useful for readers and safer for the brand.
AI image SEO before publishing
AI image SEO starts with relevance. The image should sit near text that explains it. The file name should describe the visual. The alt text should help someone understand the image if they cannot see it. Captions are useful when the image adds detail to the page.
Google's image SEO documentation recommends helping Google discover and index images, using HTML image elements, responsive images, supported formats, and speed-conscious files. Review the official guidance at Google Image SEO best practices. For AI visuals, those basics still apply.
Get professional logo and complete corporate identity designs to attract customers.
Do not stuff the focus phrase into every alt field. Use one descriptive alt where it fits, then describe the other images naturally. A diagram can say "AI image prompt workflow for blog visuals." A product scene can say what appears in the scene. Clear beats repetitive.
Also check compression and dimensions. Large images slow pages. Missing width and height can cause layout movement. If the image is decorative, you may not need a long alt text. If it explains a process, make the alt useful.
Business visuals with AI and brand control
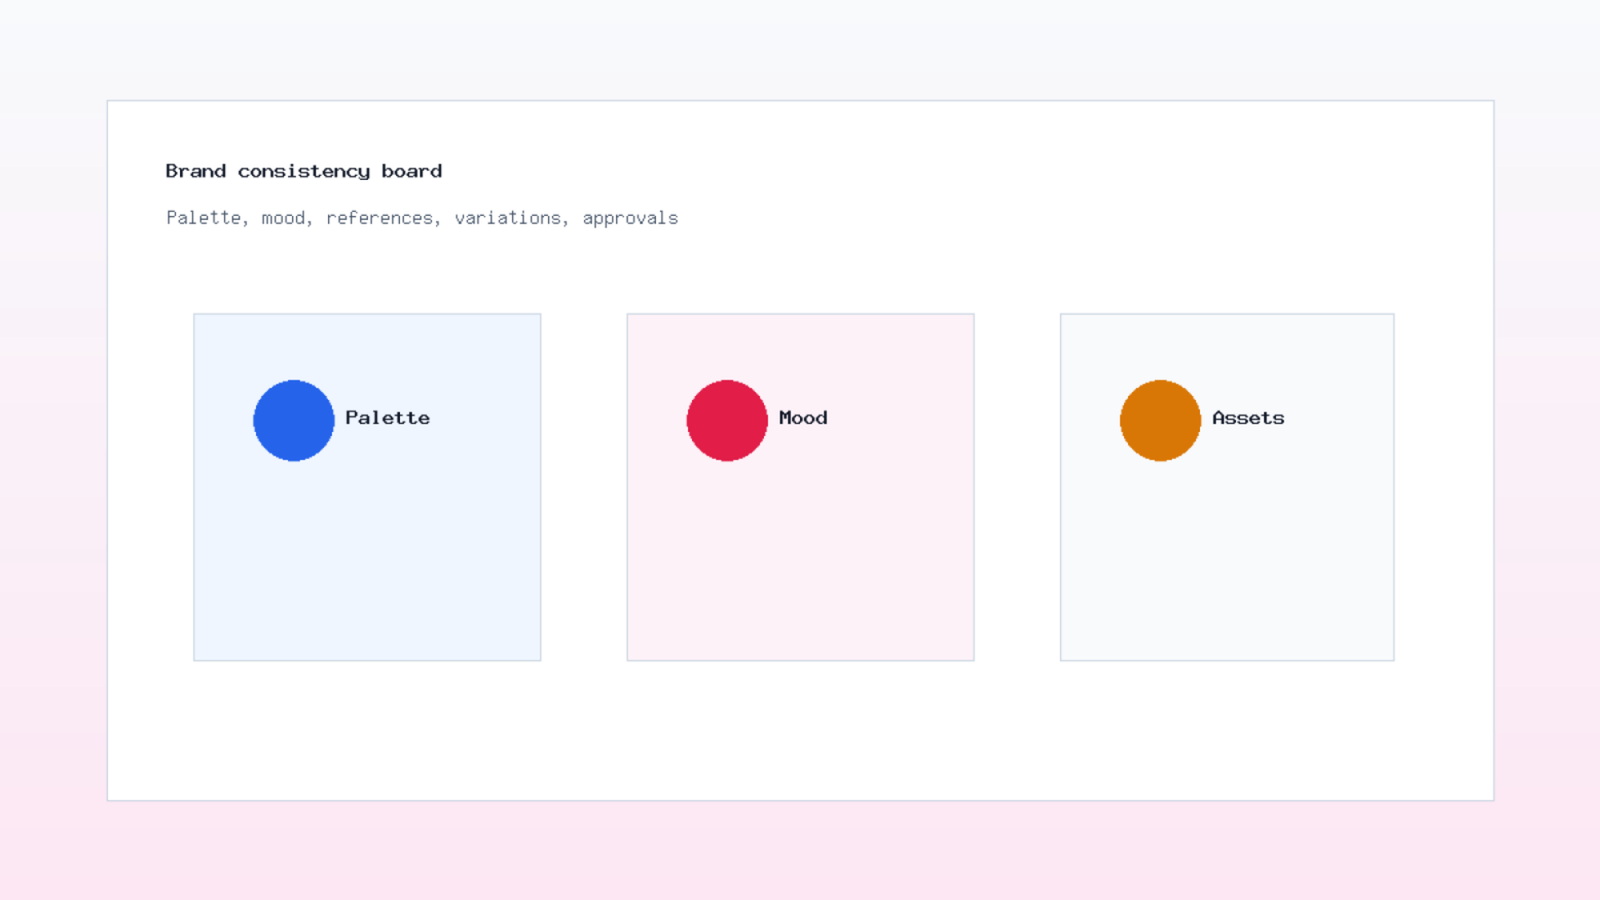
Business visuals with AI need guardrails. A brand should not look different on every page just because each prompt used a new style. Define colors, lighting, illustration style, photo realism level, and common composition rules before generating a batch.
Use a simple visual rule sheet. Include preferred colors, banned colors, logo usage, image mood, allowed subjects, and example prompts. Then compare each output against the sheet. This is faster than debating every image from scratch.
If you use AI visuals for landing pages, connect them to the offer. A service page needs clarity. A product page needs accuracy. A case study may need diagrams or dashboard views. A blog can use explanatory images, but they still need to match the topic.
X-Kaizen can help connect this work to the wider site. Review X-Kaizen services, read related guides on the X-Kaizen blog, or send a page brief through the contact page. We can help turn AI visuals into web assets that fit the brand, content, and search plan.
How Create AI-Generated Images without common mistakes
The phrase How Create AI-Generated Images can sound like a tool question, but most failures come from planning. Weak prompt. No review. No rights check. No size plan. No image SEO. Fix those basics first.
Use this short checklist before publishing: goal clear, subject accurate, prompt saved, rights checked, brand fit reviewed, file compressed, alt text written, dimensions present, page context strong. If one item fails, pause. The fix is easier before launch.
Finally, treat each image as part of a page. A strong image cannot rescue weak copy. However, a clear visual can support the headline, explain a concept, and make the next action feel easier. That is the practical value of a disciplined AI image workflow.


Comments (0)